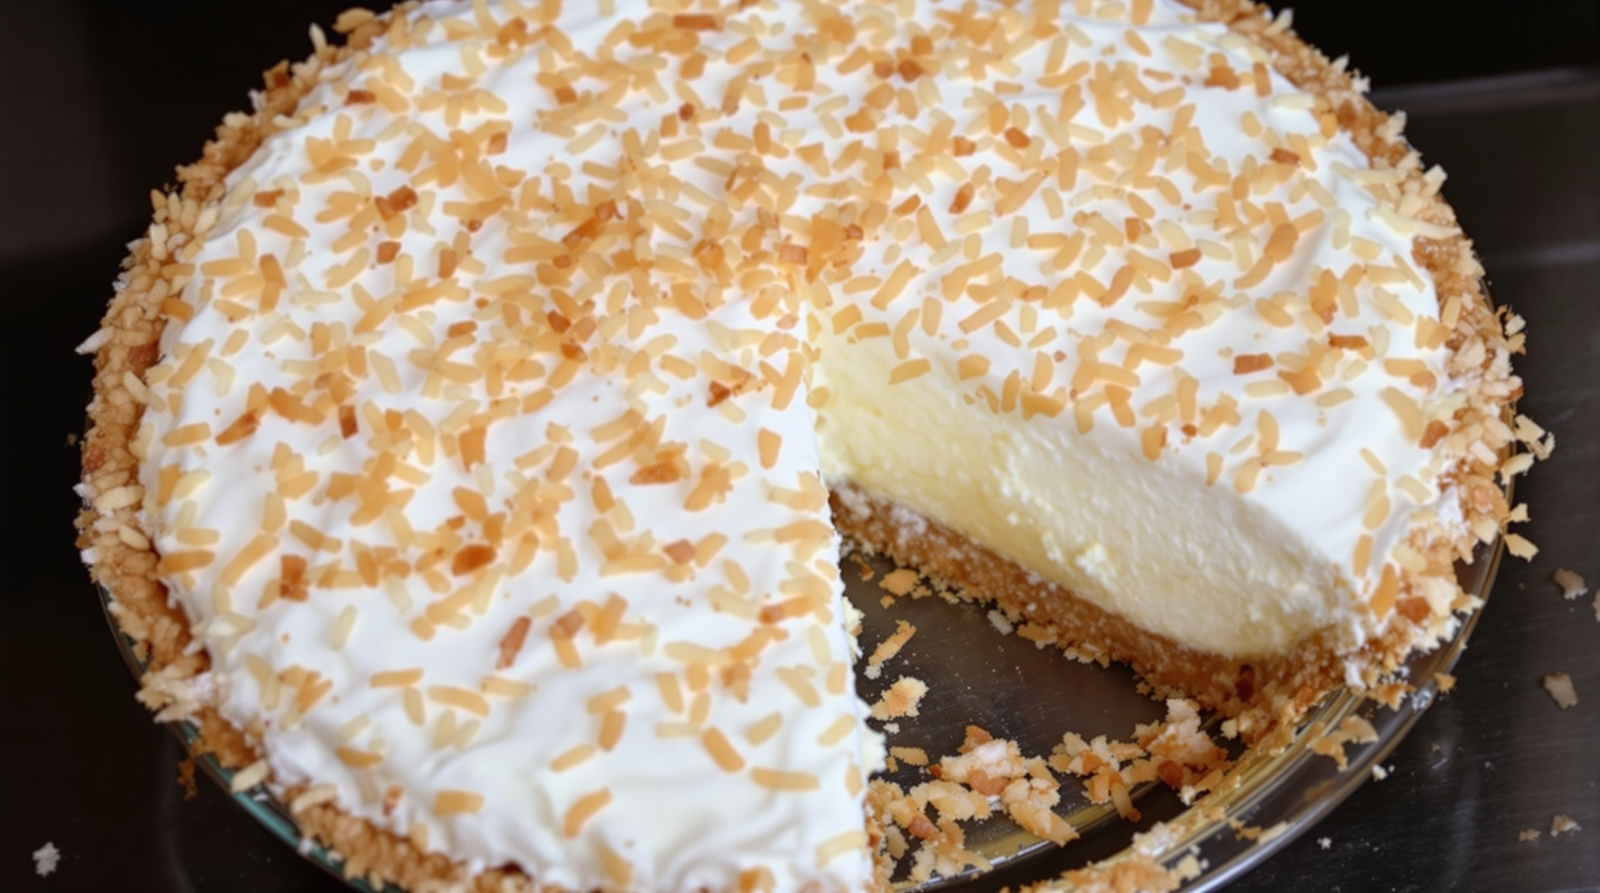
Cheesecake is a dessert that has captured hearts around the globe, and my personal favorite is the Cherry Topped Cheesecake. Its origin traces back to the ancient Greeks, but it’s the Americans who have truly mastered this sweet delight, especially in New York City, where the cheesecake is renowned. This recipe, however, brings a fruity twist to the classic, with a tantalizing cherry topping that adds a pop of color and an extra layer of flavor. It’s creamy, it’s sweet, and that cherry topping brings in a tangy note that cuts through the richness, making each bite a heavenly experience. What I love about this cheesecake is its perfect balance of flavors. The sweetness of the cake, the tanginess of the cherries, and the crunch of the crust come together in a symphony of flavors that’s simply irresistible. Plus, it looks spectacular, making it a perfect dessert for dinner parties or special occasions. And don’t worry if you’re new to baking, the process is quite straightforward and I’ll guide you through it step by step. So, are you ready to bake the best Cherry Topped Cheesecake ever?
Ingredients
- 1 pkg. yellow cake mix
- 2 Tbsp. oil
- 2 (8 oz.) pkg. cream cheese
- 1/2 c. sugar
- 4 eggs
- 1 1/2 c. milk
- 3 Tbsp. lemon juice
- 3 Tbsp. vanilla
- 1 can cherry pie filling
Baking Instructions
- Preheat oven to 300°.
- Reserve 1 cup of dry cake mix.
- In large mixing bowl, combine remaining cake mix, 1 of the eggs and oil (mixture will be crumbly).
- Press mixture in bottom of 13 x 9-inch pan for crust.
- Press up sides.
Calorie: 500
Total cooking time: 1 hour 30 minutes
Difficulty level: Medium

The Great Cherry Cheesecake Saga
Hey there! Let me tell you about the time I decided to whip up a Cherry Topped Cheesecake. I mean, who wouldn’t want to dive into a creamy, sweet and tangy dessert, right?
The Starting Line
So, it all began with this yellow cake mix I had lying around, just begging to be put to good use. And then I remembered – I had all the makings of a cheesecake. A quick check in the fridge confirmed my suspicions. There they were: cream cheese, sugar, eggs, milk, lemon juice, vanilla and a can of cherry pie filling. It was like they were all lined up in formation, ready for duty.
Preheat and Prep: The Oven Tango
Preheating the oven to 300° was the easy part. The real fun began when I had to reserve 1 cup of the dry cake mix. Now, I’m no math whiz, so let’s just say there was a considerable amount of squinting and guesstimating involved.
The Crumbly Situation
Next, I had to combine the remaining cake mix, one egg and the oil in a large mixing bowl. Now, this is where things got interesting. The recipe instructed me that the mixture would be crumbly. And boy, they weren’t kidding! It was like trying to build a sandcastle with dry sand. But hey, who doesn’t love a good challenge?
The Crust Creation Conundrum
Alright, this was the moment of truth. I had to press the crumbly mixture into the bottom of a 13 x 9-inch pan to form the crust. There was a lot of pressing and praying happening. I also discovered that I could press up the sides. Who knew I had such sculpting talent?
The Creamy Filling Fiasco
Now, it was time to combine the cream cheese, sugar, the remaining eggs, milk, lemon juice and vanilla. Here’s a pro tip: when dealing with cream cheese, always make sure it’s at room temperature. I learned this the hard way. Let’s just say I had a wrestling match with a block of cream cheese and the cream cheese almost won.
Cherry on Top: The Finishing Touch
Finally, came the grand finale: the cherry pie filling. After a quick prayer to the baking gods, I opened the can and spread the filling on top of the cheesecake. Now, this part was surprisingly smooth – a cherry on top of a slightly chaotic baking session, you could say.
The Verdict
So, there you have it, the saga of my Cherry Topped Cheesecake. It was a rollercoaster ride of crumbly crusts, cream cheese wrestling, and cherry topping triumphs. But let me tell you, every bite of that cheesecake was worth the ride. The creamy texture, the sweet and tangy flavor, and the satisfaction of knowing I’d made it myself? Absolutely priceless.
So, if you’ve got a yellow cake mix lying around, I say go for it! Dust off that apron and dive into the delicious chaos. Trust me, it’s a blast. And who knows, you might just discover your own hidden sculpting talent, too!